top of page
Steps to Repair and Recover Corrupted/Damaged InDesign (.indd) Files
Step 1: Download, install and launch InDesign File Repair Tool. Click ‘Next’ to advance ahead.
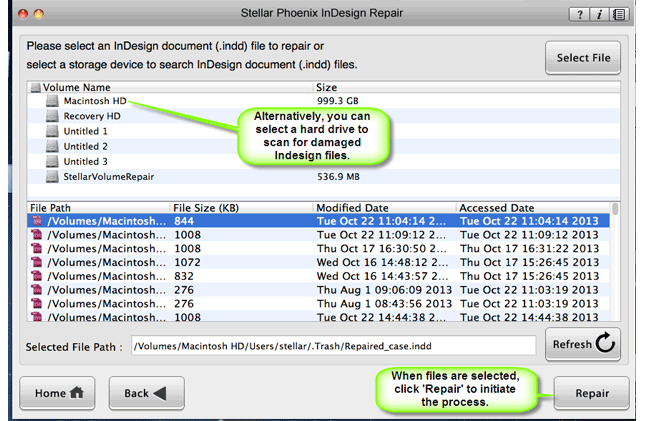
Step 2: Now click on ‘Select File’ so that you can browse your preferred segment in your Mac and then pick the damage INDD file.
Step 3: Or choose personage hard drive or volume so as to verify all INDD files. After INDD files are listed, you can opt for troubled one and click ‘Repair’ option.
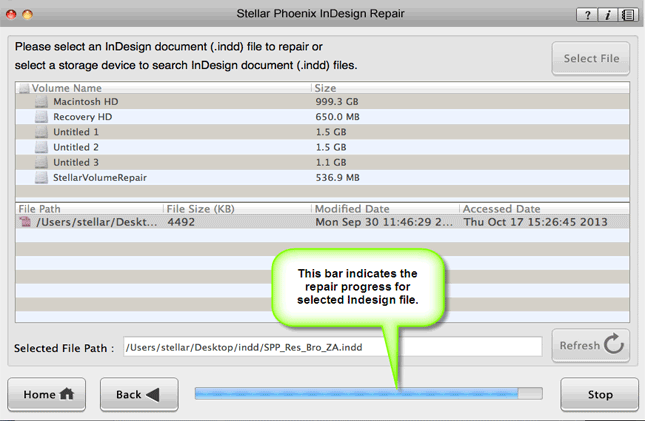
Step 4: In development bar, you can check ongoing process.
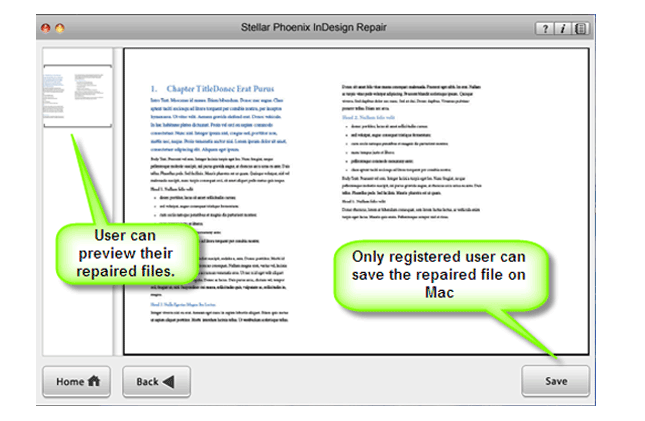
Step 5: Software opens up repaired file with Adobe InDesign to demonstrate its preview when the file is repaired.
Step 6: Finally click on ‘Save’, to recover and save repair InDesign (.INDD) files on your system.


Like & Follow Us On


Recent Posts
bottom of page